Thundaflo E2 Level Entry Channel Installation Process
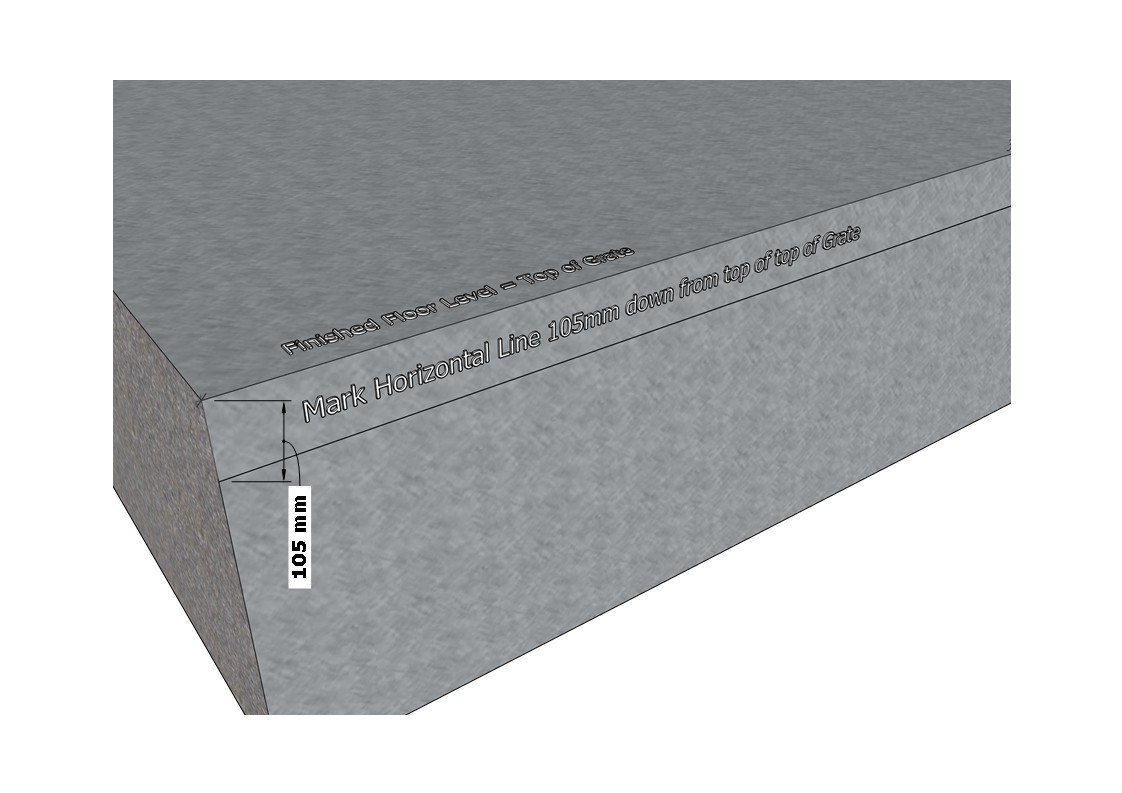
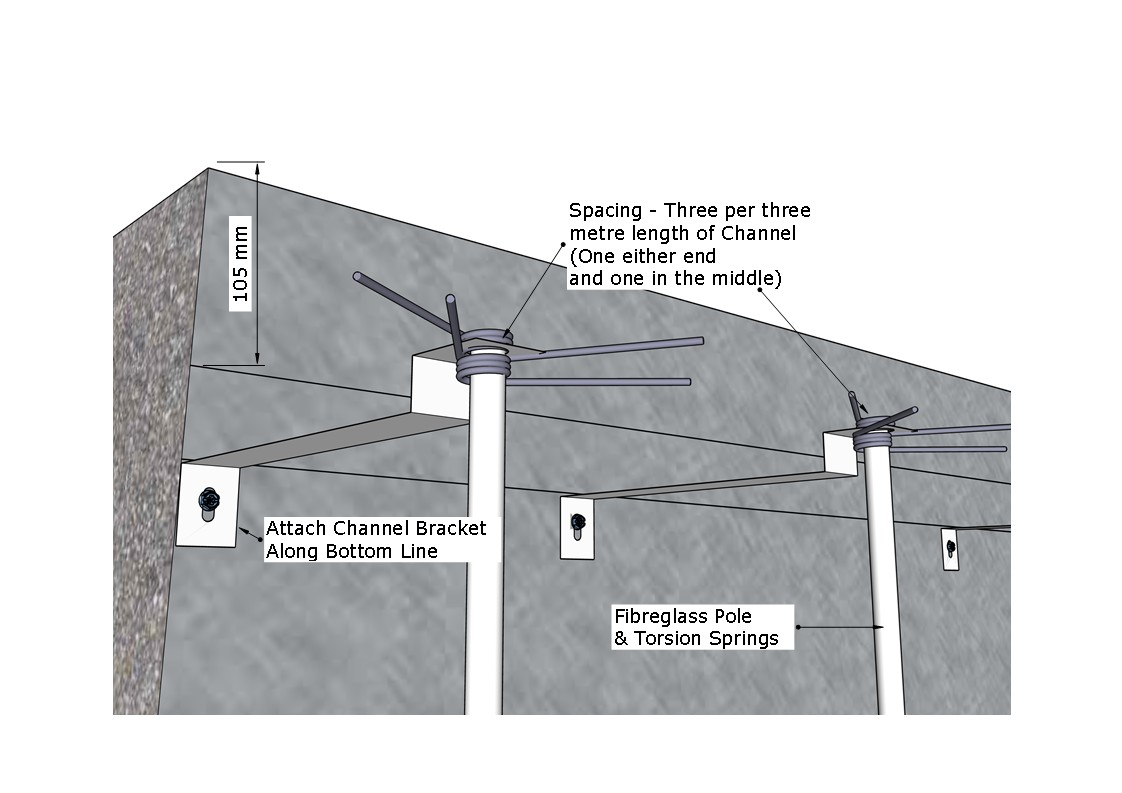
Stage 1. Mark a "Stringline" on the face of the slab 105mm below the level of the Grating
Stage 2. Use the Channel Wall as a Template
The Wall can be Rotated to Change Direction of Flow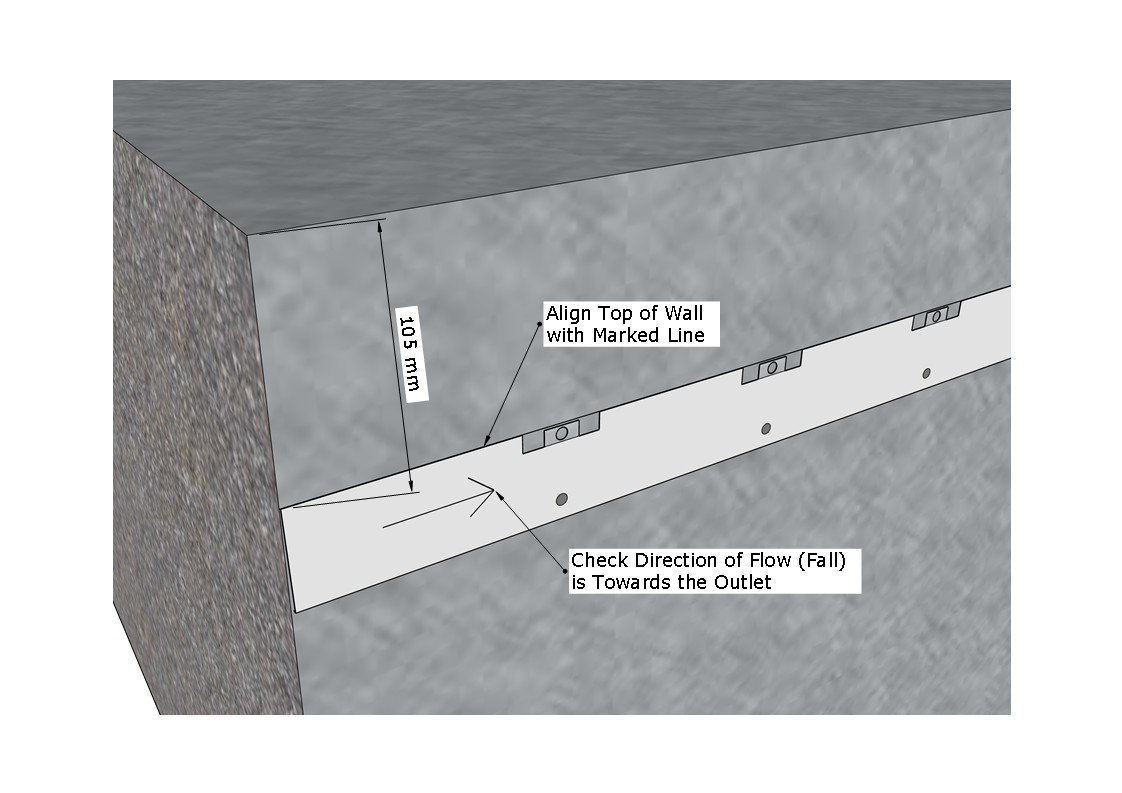
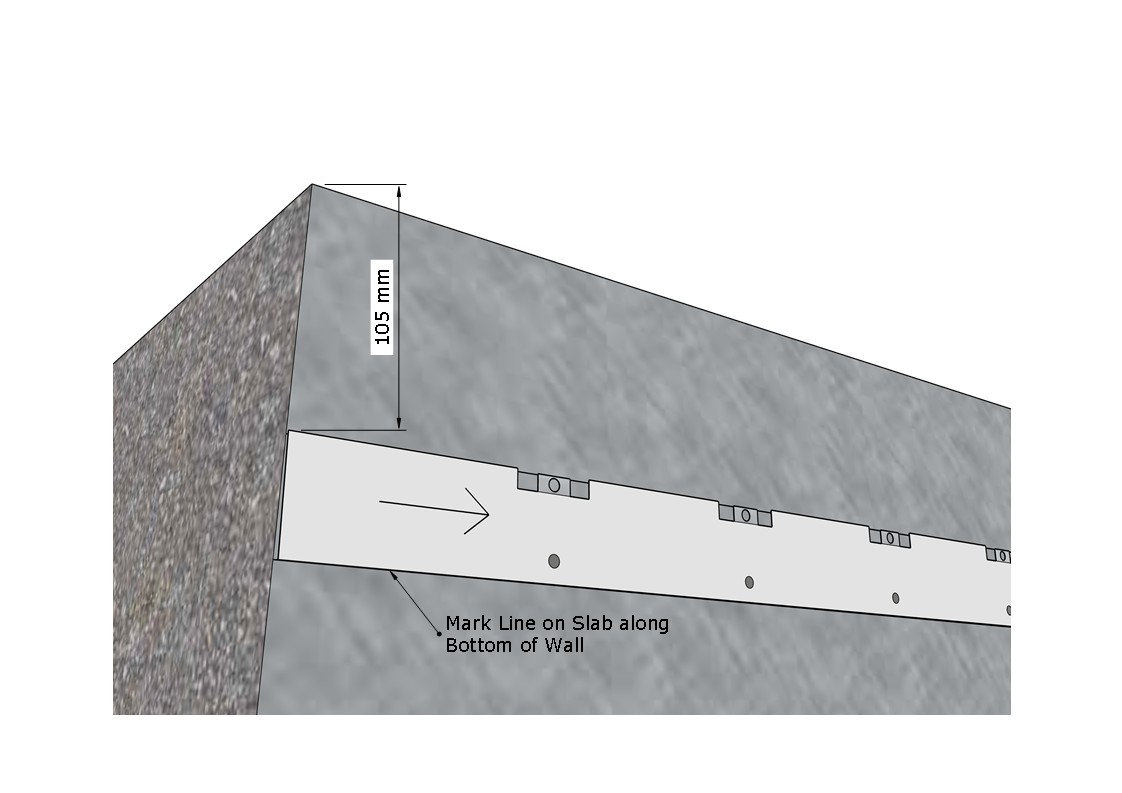
Stage 3, Mark line on Slab along the bottom of the wall.
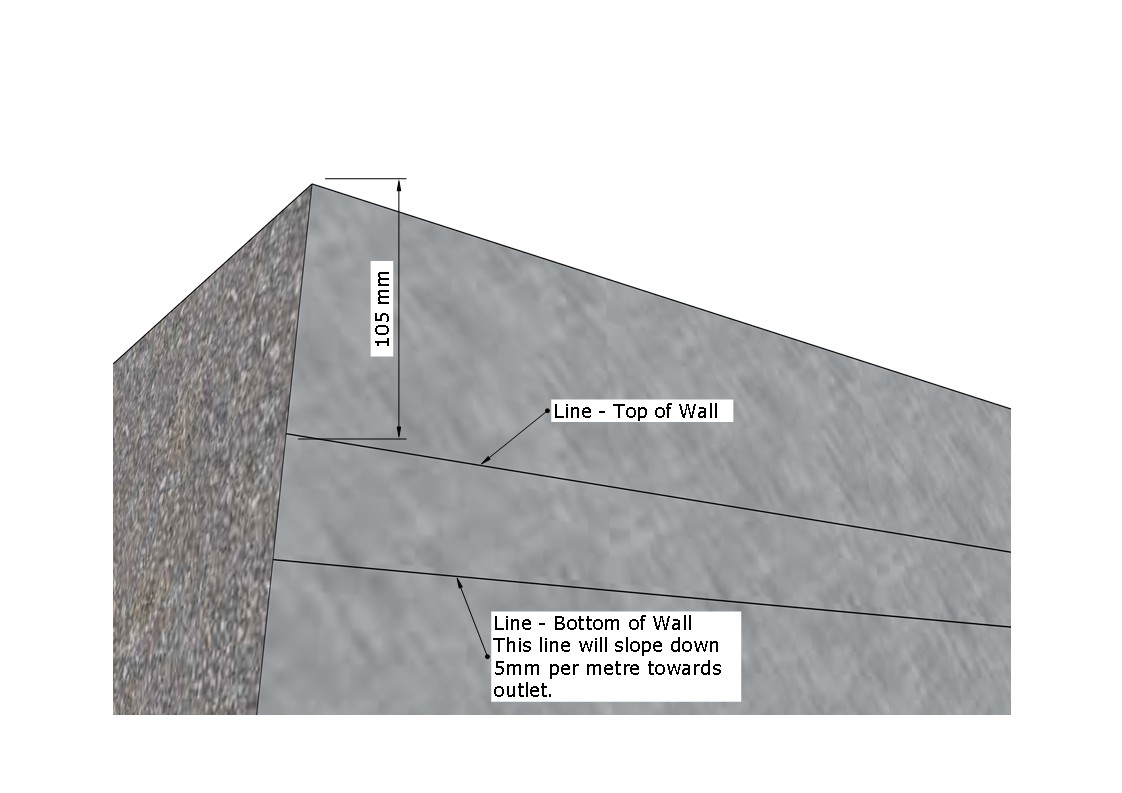
Stage 4. The top line is horizontal (parallel with top of grate) and the bottom line will slope down 5mm per metre - Built-in-Fall.
Stage 5. Attach the channel brackets along the bottom line.
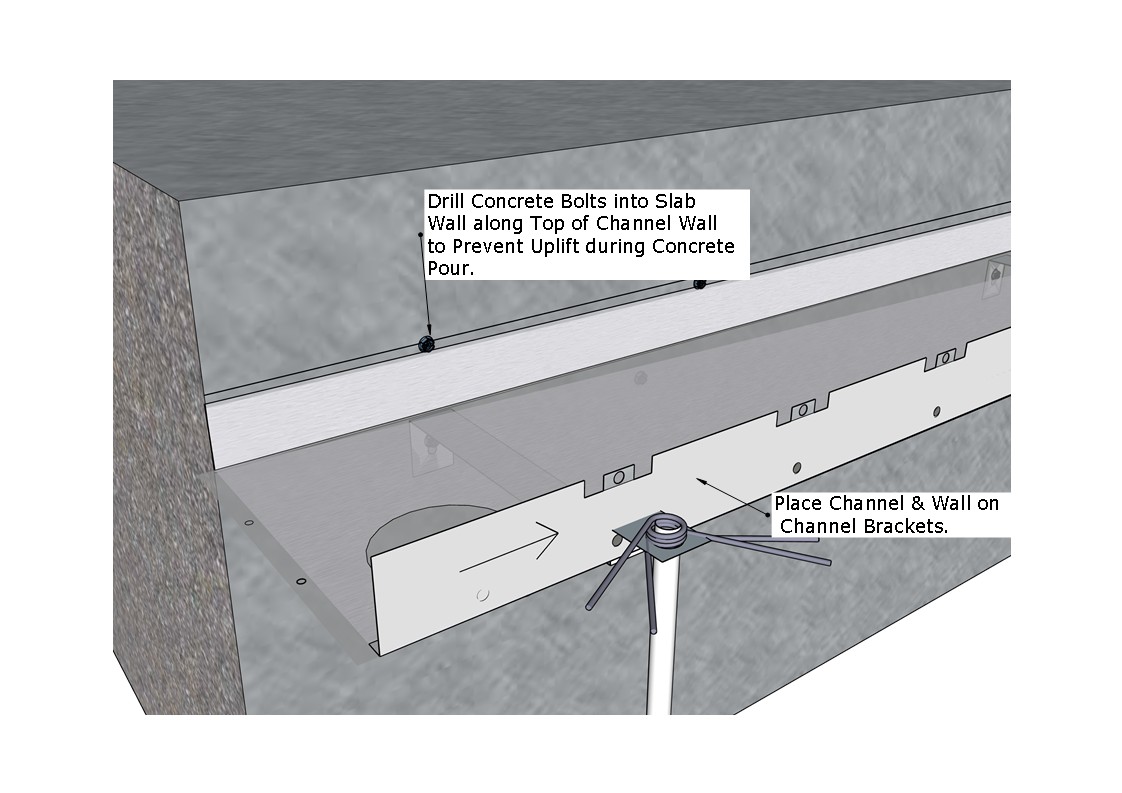
Stage 6. Attach the wall to the channel and place on brackets.
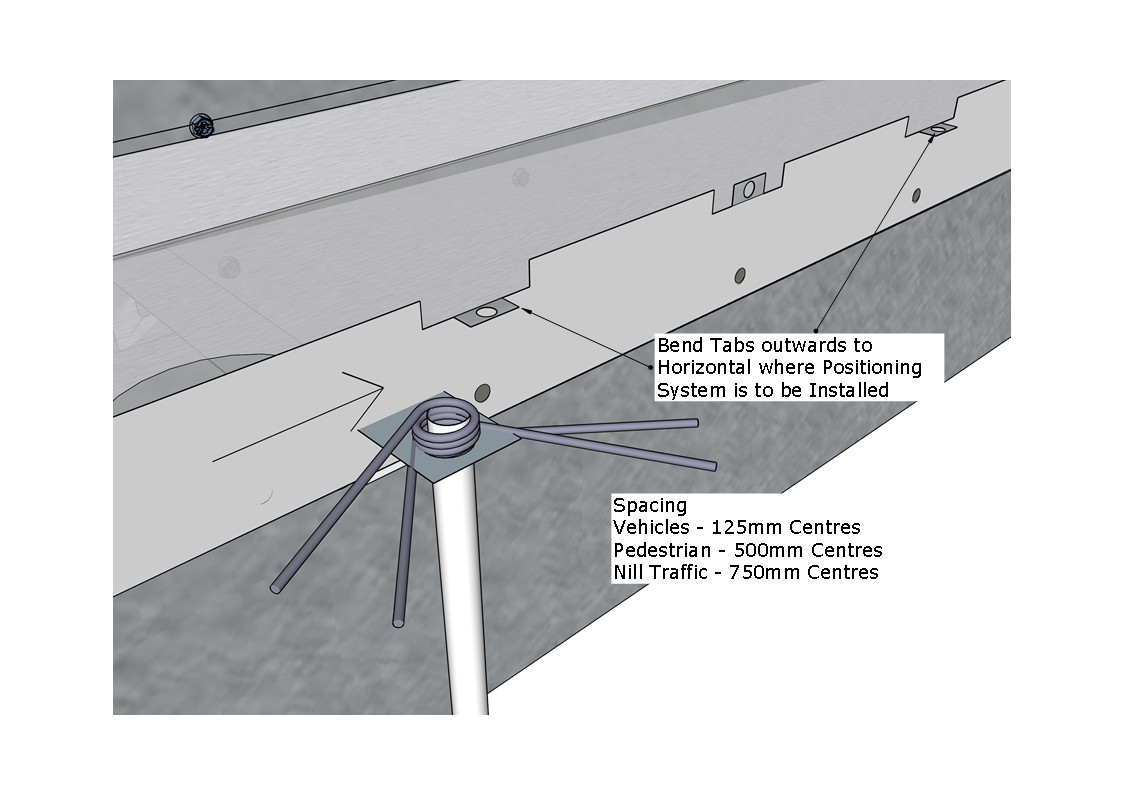
Stage 7. Bend wall tabs out where positioning system is to be located.
Guide for Spacing
Vehicle traffic: 125mm (every tab)
Foot traffic: 500mm (every 4th tab)
Nil traffic: 750mm (every 6th tab)
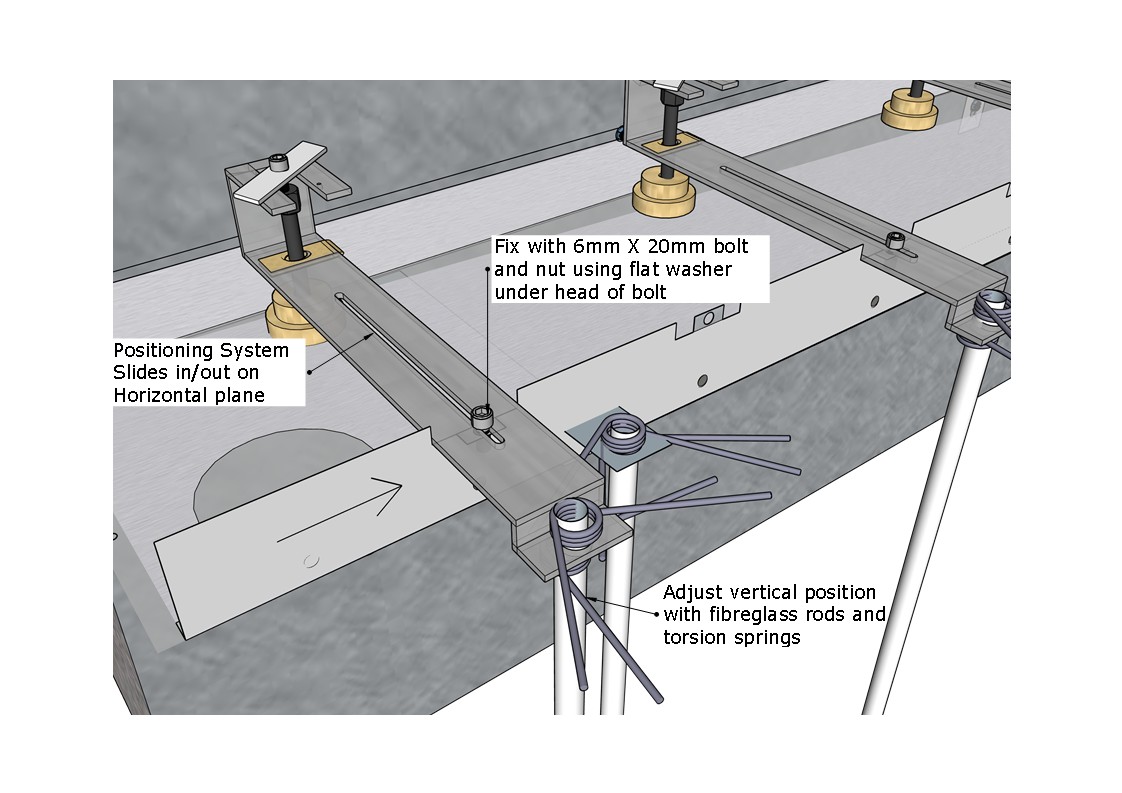
Stage 8. Attach positioning system.
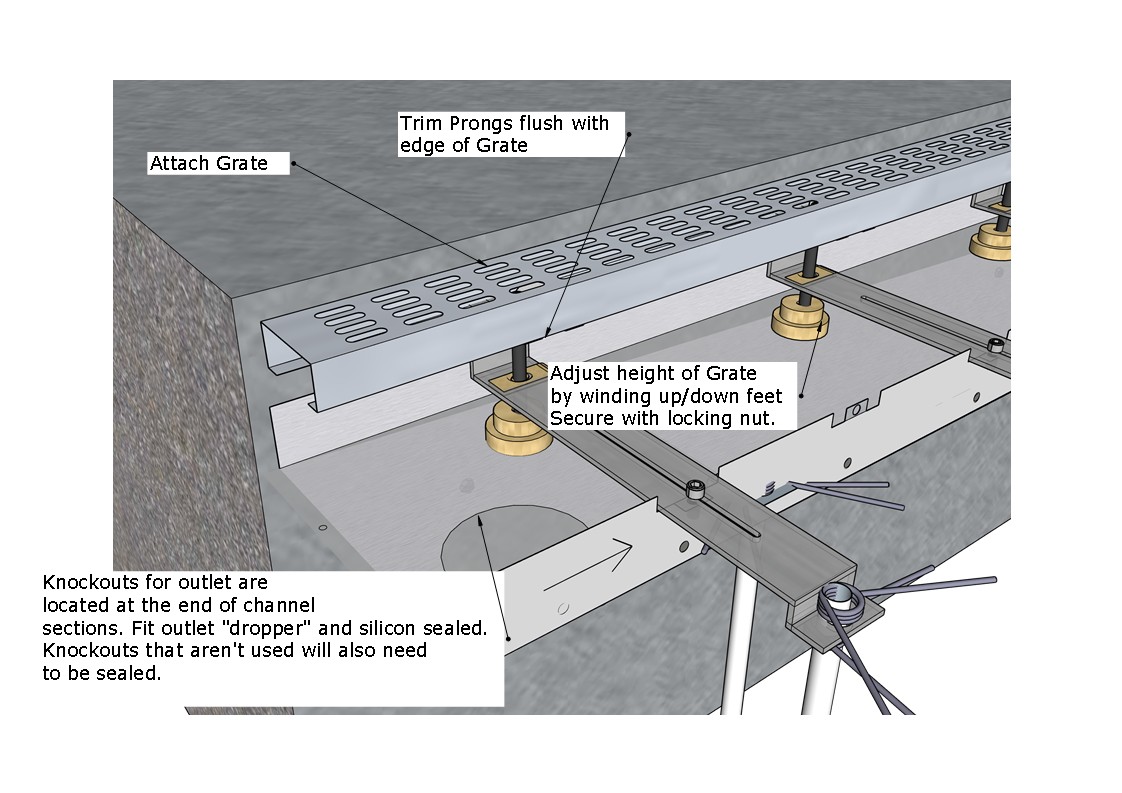
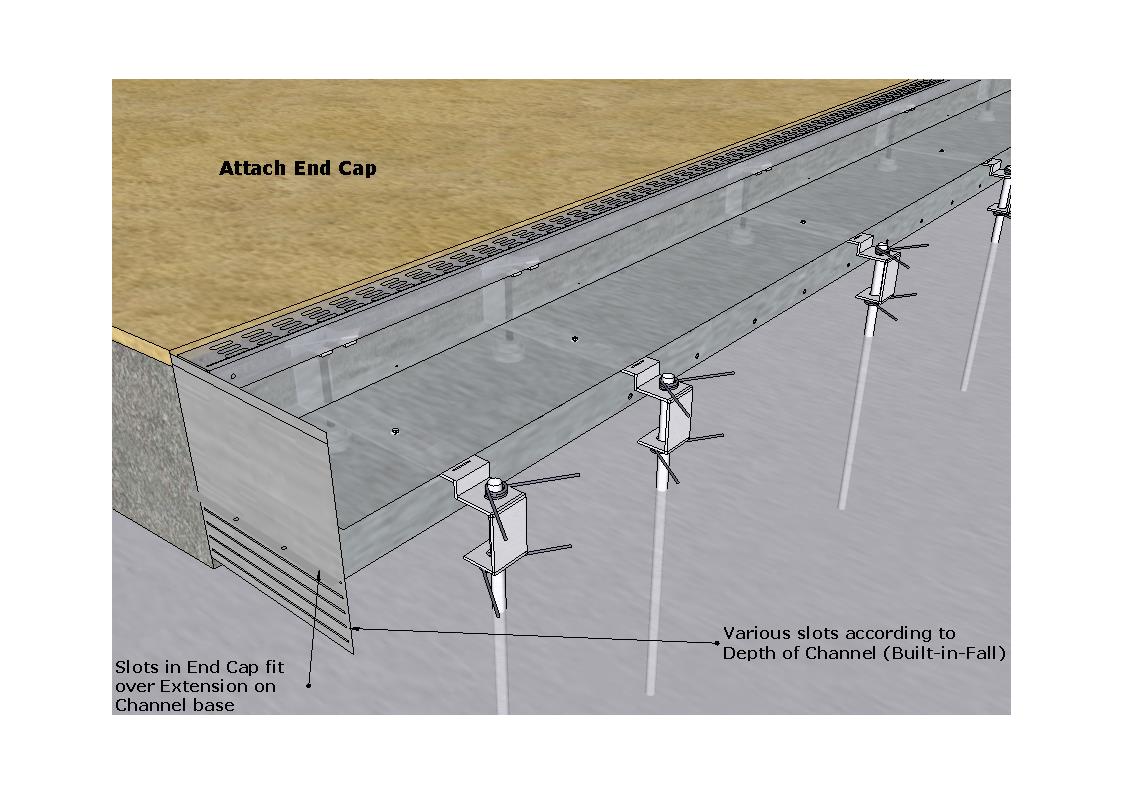
Stage 9. Attach grate and outlet.
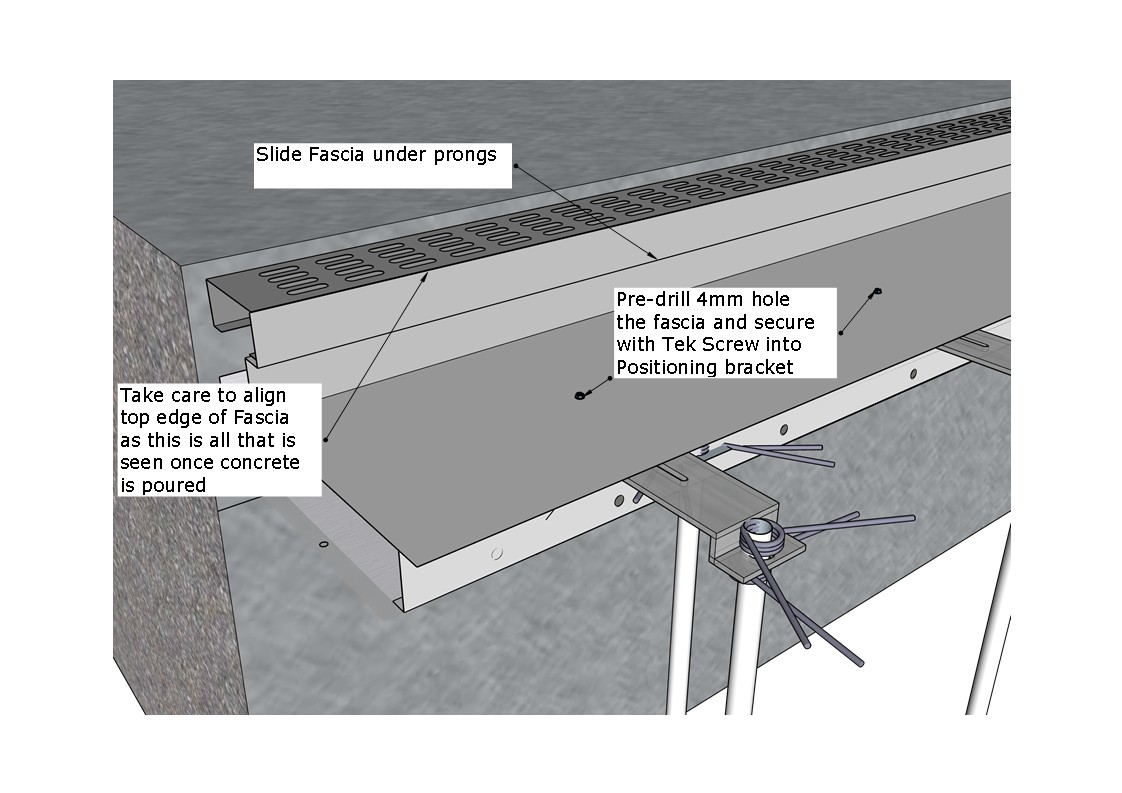
Stage 10. Attach facia to enclose drain.
 N.Z. Pat. Appl. No. 809326